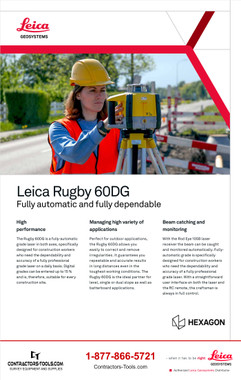
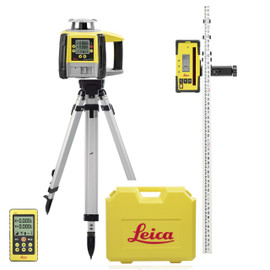
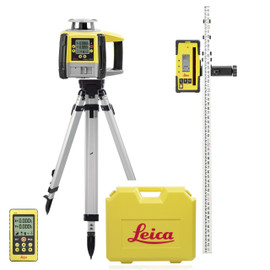
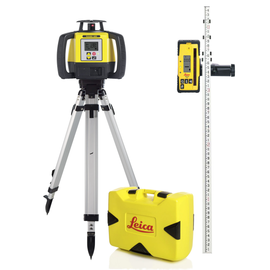
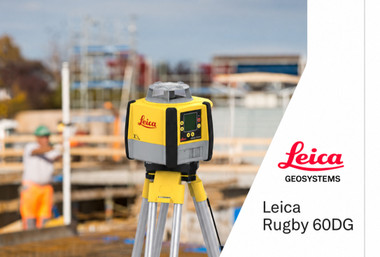
Type your grade in on both axes — and let the laser hold it.
The Leica Rugby 60DG sets X and Y digitally, catches an existing grade on its own, and holds the plane across 3,000 ft while you stay at the work.
LEICA PKG6020269-K2dual axis
15 % single axis
Dial a number into the Rugby 60DG and it does the rest. No tilting the head by eye, no walking a rod back and forth to prove the slope — you enter the percentage you need on X, the percentage you need on Y, and the laser levels itself to that plane and keeps it there. Horizontal, single slope, dual slope and batterboard work all come off the same instrument, and it lays down for vertical alignment when the job turns sideways.
This is the laser Leica built for crews who set grade every day and cannot afford to re-shoot it.
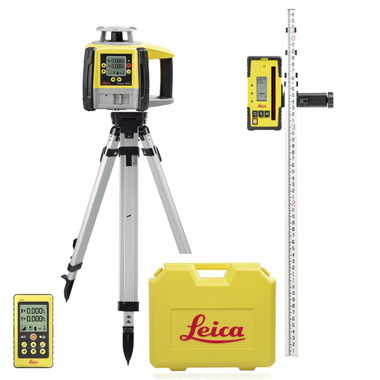

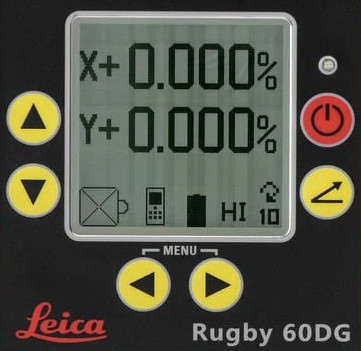
Two numbers. That is the whole job.
Enter the fall you need on X, enter the fall you need on Y, and the Rugby 60DG levels itself to that plane and holds it. The RC60 remote shows the same screen from a thousand feet away, so the grade is never something you have to walk back and check.
Leica Rugby 60DG Kit — Package 6020269-K2
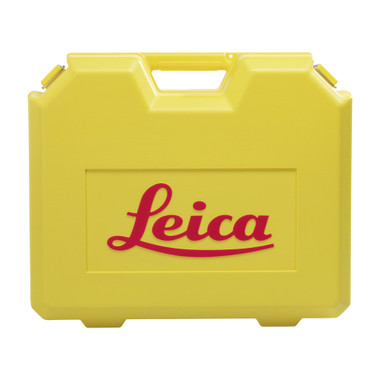
A complete, ready-to-work dual grade system, customized and shipped by Contractors-Tools.com. Laser, digital receiver, remote and case — nothing else to buy to set grade on day one. This K2 kit adds a SitePRO heavy-duty aluminum tripod and a 15-foot aluminum grade rod marked in inches.


Charge it without taking it apart
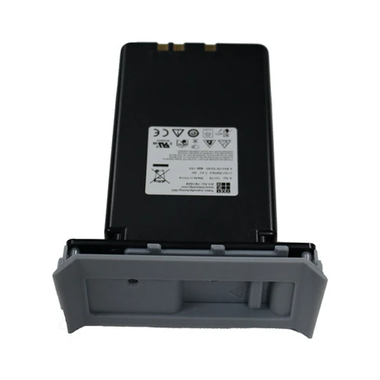
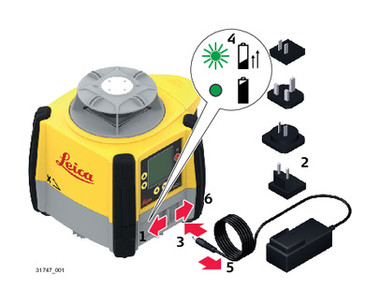
Slide the lock on the battery compartment to the centre position, plug the A100 charger into the jack, and leave it. The pack charges in place — nothing comes out of the laser, nothing gets lost in the truck. A small LED by the jack flashes while charging and goes solid when it is full.
A full charge takes five hours and gives you 40. More useful on a Monday morning: one hour on the charger runs a full eight-hour day. Slide the lock back to the left afterwards to keep dirt out of the jack.
Three things a fully automatic dual grade laser does that a manual one cannot
You enter the number
Punch the grade into the keypad or the RC60 and the Rugby 60DG levels itself to that plane. X and Y are separate figures, entered to three decimal places. There is no tilting the head and checking it with a rod, and no arithmetic on the tailgate.
It finds an existing grade for you
Beam catching: put the Rod Eye 105B where the grade needs to land, and the laser hunts the beam onto the receiver, shows you the grade it found, and then holds it. You match an existing slope without ever calculating it.
It holds the plane after you walk away
Self-levelling runs continuously within ±5°, and the height alert catches a tripod that has been bumped or has settled. At 900 rpm the beam is steadier for a machine-mounted or long-range receiver than a 600 rpm head.
Leica Rod Eye 105B — the half of this kit that does the catching
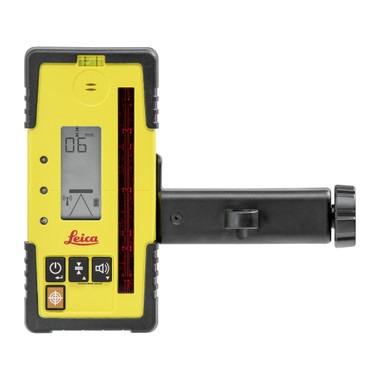
The Rod Eye 105B is not a passive target. It is the component that makes the Rugby 60DG's headline features work: beam catching and beam lock are receiver-driven, and without the 105B the laser is a conventional dual grade instrument.
It reads out in millimetres on an LCD you can see from the rod, shows a five-channel arrow display for above, below and on-grade, and carries a bubble vial so you know the rod is plumb when you take the shot. Front and rear displays mean you can read it from either side of the rod.
- 105 mm (4 in) extended detection window — a wide capture band, so you spend less time hunting for the beam on a tall rod
- 90 mm (3.5 in) numeric readout — the exact distance off grade in millimetres, not just an arrow
- 900 m / 3,000 ft working diameter — matched to the laser, so the kit has one range, not two
- Two accuracy bandwidths — Fine ±1 mm for finish grade, Coarse ±3 mm for rough cut and fill
- High / Low / Off audio — audible on-grade tone you can turn down in a quiet zone or off entirely
- Beam catch button — the orange key that tells the laser to come find this receiver
- Rod bracket included — clamps to a grade rod straight out of the box
Every button on the Rod Eye 105B
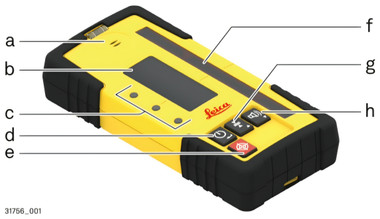
- aSpeakerOn-grade tone, with high, low and off settings for quiet zones.
- bLCD digital displayThe numeric readout — how far off grade you are, in millimetres, not just an arrow.
- cLED displayFive-channel arrow indication: above, below, on grade.
- dPower buttonPress once for on, hold 1.5 seconds for off.
- eBeam Catch buttonThe orange key. A press captures the reading; 1.5 seconds starts Beam Catching; 5 seconds starts Beam Lock.
- fReception windowThe 105 mm detection band — a wide capture area so you spend less time hunting the beam.
- gBandwidth buttonSwitch between fine and coarse detection: ±1 mm for finish, ±3 mm for rough cut and fill.
- hAudio buttonChange or silence the on-grade tone.
Leica RC60 — the same screen, 1,000 ft away
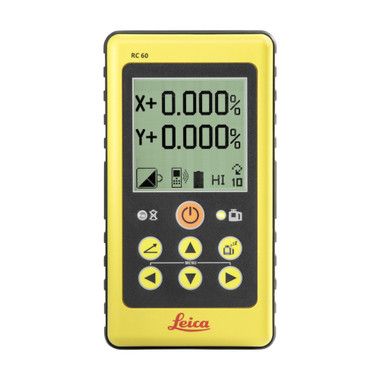
The RC60 mirrors the laser's own display. The same X+ and Y+ grade percentages, the same menu, the same keys — so there is nothing new to learn and no guessing about what the instrument is doing from across the site.
- 1,000 ft (300 m) operating radius — change grade from where the work is, not from the tripod
- Live X and Y readout — confirm the plane without walking back
- Grade, menu and standby keys — full control of slope entry and alignment
- 70 hours on two AA cells — batteries you can buy anywhere
If you work alone, this is the part of the kit that pays for itself first. Every grade change on a laser without a remote is a walk to the tripod and a walk back.
Every piece in the kit
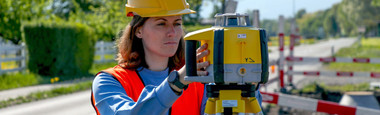
Six keys. That is the whole interface.
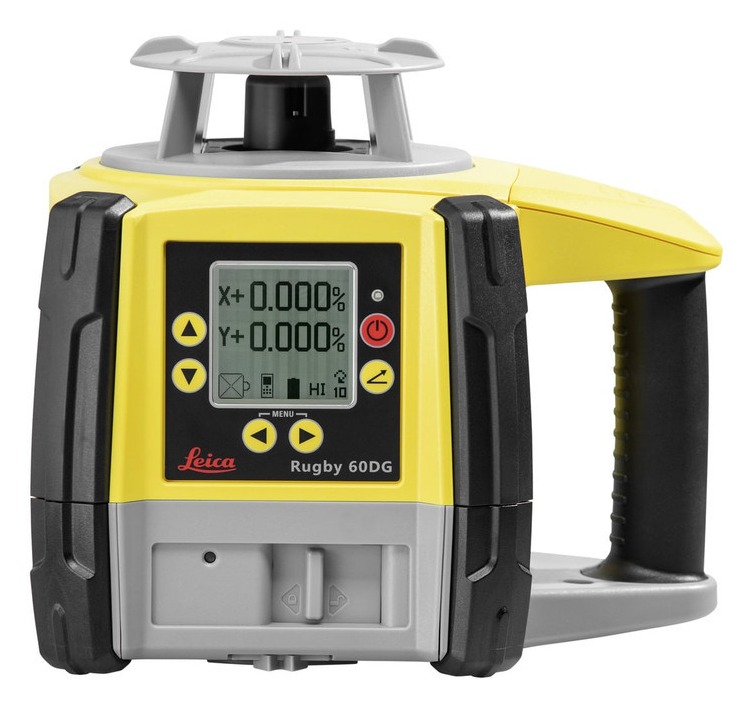
A fully automatic laser should not need a specialist to run it. Set the Rugby 60DG on the tripod, switch it on, and it levels itself within ±5° without being touched. Everything after that happens on one screen with six keys — and the RC60 remote carries the same six, so whoever is out at the work sees exactly what the laser sees.
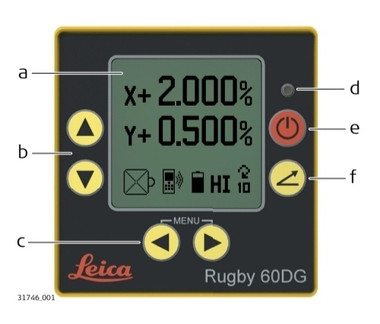
- aLCD displayX and Y grade on one screen, with beam masking, radio, battery, H.I. and head speed along the bottom.
- bUp and down arrowsChange the grade value. Press both together to zero the grade instantly.
- cLeft and right arrowsMove the cursor to edit a single digit or the plus/minus sign. Press both together to open the menu.
- dStatus LEDTells you the levelling state at a glance, from across the pad.
- ePower buttonOn and off. Hold it five seconds to pair the laser with the remote or the receiver.
- fGrade buttonStarts grade entry — once for X, again for Y. Hold it 1.5 seconds to restore the last grade you used.
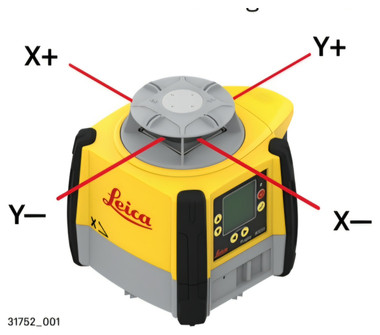
Which way is X+?
Entering 2 % is only half the job — the laser has to fall the right way. The raised arrow marks moulded into the top of the housing show you: X runs front to back as you sight over the top, Y runs across it.
On a road crown, set up on the centreline and simply flip the plus/minus sign to drop the cross axis left or right instead of moving the instrument. That one trick is in Leica’s manual and almost nowhere else.
What the spec sheet leaves out
The Rugby 60DG has a menu behind that six-key panel, and most of what makes it worth owning on a difficult site is in there. These are the settings that matter, taken from Leica’s own user manual.
Beam masking
Switch the beam off on one or more sides of the laser so it cannot interfere with another laser or another crew’s receiver working the same site. Block half or three quarters of the sweep — 16 combinations. It resets at power-off unless you tell it to remember.
Two sensitivity settings
Setting 1 for a calm day. Setting 2 when wind and vibration are severe — it stops the laser hunting and re-levelling every time a loaded truck goes past. If your laser keeps stopping to re-level, this is the fix, not a fault.
H.I. Alert, on by default
Arms itself 30 seconds after the laser finishes levelling. If the tripod is bumped or settles, the screen flashes and the laser beeps rapidly rather than quietly handing you a wrong elevation. Two minutes in alert and it shuts down.
Manual mode
Turn self-levelling off and tilt the plane by hand — or use manual mode with grade, where it levels to your entered grade first and then holds that plane without correcting. Useful when you deliberately want the beam off level.
Temperature re-check
The laser re-checks level every time the temperature moves 5 °C — or every 2 °C if you set it finer. That is the difference between a plane that holds from a cold morning into a hot afternoon and one that quietly drifts.
Calibration alert
Set it and the laser tracks its own hours, then tells you when service is due. The default is 1,040 hours — about six months of a 40-hour week. The start-up screen shows hours since the last calibration and hours remaining.
Your company name on the screen
Enter six lines of up to 20 characters — company, address, phone — shown every time the laser powers up, and lockable behind a four-digit password. Worth doing on a fleet instrument, and it makes a stolen one awkward to resell.
Percent, per mil, or finer
Read grade as percent or per mil, to thousandths or hundredths. Set it to match the drawings you were handed instead of converting in your head on the tailgate.
You can calibrate it yourself
Leica publishes the full field procedure for checking level accuracy and adjusting the X, Y and Z axes. Each adjustment step is about 2 arc seconds; five steps move the beam roughly 1/16" at 100 ft. Check it on receipt and periodically after.
Radio off to save battery
Not using the remote or the beam-catch receiver that day? Switch the radio off in the menu and the battery lasts longer. Pairing turns it back on automatically.
Optional sighting scope
There is a mounting plate on top for an optional sighting scope, which makes aligning the axes far quicker on a second-day setup. Do the precise alignment procedure first, then set the scope to those axes.
Agricultural levelling
Leica documents mast-mounted use: receiver on a mast on the machine, raised until it reads on grade, and the beam becomes a constant reference for land levelling. The 15 rps head is the one you want for a moving target.
Specifications
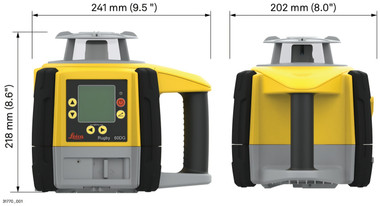
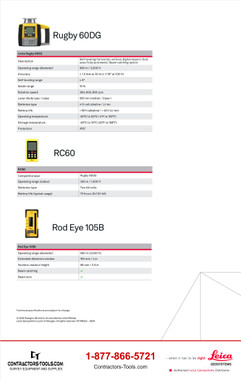
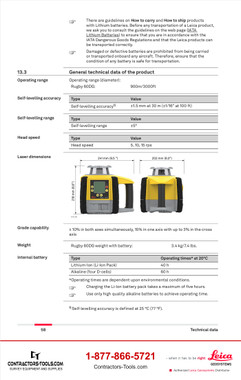
241 × 202 × 218 mm (9.5 × 8.0 × 8.6 in) · 3.4 kg / 7.4 lb with battery
| Function | Self-levelling horizontal, vertical and digital slope in dual axes — fully automatic. Beam catching option. |
| Operating range (diameter) | 900 m / 3,000 ft |
| Accuracy | ±1.5 mm at 30 m (±1/16" at 100 ft) |
| Self-levelling range | ±5° |
| Weight with battery | 3.4 kg / 7.4 lb |
| Dimensions (W × D × H) | 241 × 202 × 218 mm (9.5 × 8.0 × 8.6 in) |
| Grade capability | ±10 % in both axes simultaneously; 15 % in one axis with up to 3 % in the cross axis |
| Head speed | 5, 10, 15 rps (300 / 600 / 900 rpm) |
| Laser diode / class | 635 nm visible / Class 1 |
| Battery type | Four D-cell alkaline, or lithium-ion pack |
| Battery life | 40 h lithium-ion / 60 h on four D-cells, at 20 °C |
| Charge time | 5 h maximum. A 1-hour charge runs a full 8-hour day |
| Operating temperature | −20 °C to 50 °C (−4 °F to 122 °F) |
| Storage temperature | −30 °C to 70 °C (−22 °F to 158 °F) |
| Protection | IP67, dust tight (IEC 60529) |
| Humidity | Max 95 % non-condensing |
| Altitude | 0–2,000 m |
| Operating range (diameter) | 900 m / 3,000 ft |
| Extended detection window | 105 mm / 4 in |
| Numeric readout height | 90 mm / 3.5 in |
| Beam catching / beam lock range | 100 m / 300 ft radio link, X-axis in horizontal mode |
| Beam catching | Yes |
| Beam lock | Yes |
| Compatible laser | Leica Rugby 60DG |
| Operating range (radius) | 300 m / 1,000 ft |
| Battery type | Two AA cells |
| Battery life (typical) | 70 hours |
Premium Contractor Grade Tripod and Rod
Contractors-Tools.com builds this kit with the tripod and rod we would put in our own truck, not the lightest ones that fit the price.
SitePRO 01-ALQR20-B heavy-duty aluminum tripod
The one that gets tossed in the truck, set on concrete and set up again the next morning. Its flat 5/8-11 head takes the Rugby 60DG directly.
Heavy-gauge square legs
Square-profile aluminum stays rigid fully extended: less flex, more stability.
Quick-release clamps
Positive-locking clamps you can flip, adjust and lock with gloves on.
Grips the ground
Double-banded legs and replaceable steel shoe points bite into gravel or hard clay.
Built to haul
64 in extended, 40 in collapsed, about 10 lb, black powder-coated hardware and a shoulder strap.
Sold on its own: SitePRO 01-ALQR20-B $135.00
SitePRO 11-815-C 15 ft aluminum grade rod, feet and inches
The rod the Rod Eye 105B clamps to. Read cut and fill straight off it, in the inches your plans are drawn in.
15 ft in five sections
Anodized aluminum telescoping sections that collapse to 44 in for the truck.
Reads two ways
Feet and inches on the front, a direct-reading height scale on the back for eye-level reads without math.
Locks that stay put
Polycarbonate lock buttons click in and hold height; impact-resistant moldings protect the joints.
Plumb and protected
Snap-on level vial to keep the rod plumb, weather-resistant printed graduations and a carrying case.
Sold on its own: SitePRO 11-815-C $74.95
Every Leica Rugby 60DG package we sell
Same Rugby 60DG laser, Rod Eye 105B receiver and RC60 remote in every package. Pick the power, and whether you want the tripod and grade rod in the box.
| Package | Power | Case & extras | Working diameter | Our price |
|---|---|---|---|---|
| Alkaline Powered with Rod Eye 105B | ||||
| 6020270 | Alkaline battery tray | Laser carrying case | 3,000 ft | $3,365.00 |
| 6020270-K1 | Alkaline battery tray | Tripod + grade rod (tenths) | 3,000 ft | $3,515.00 |
| 6020270-K2 | Alkaline battery tray | Tripod + grade rod (inches) | 3,000 ft | $3,515.00 |
| Rechargeable Laser with Rod Eye 105B | ||||
| 6020269 | Lithium-ion pack + charger | Laser carrying case | 3,000 ft | $3,695.00 |
| 6020269-K1 | Lithium-ion pack + charger | Tripod + grade rod (tenths) | 3,000 ft | $3,845.00 |
| 6020269-K2 YOU ARE HERE | Lithium-ion pack + charger | Tripod + grade rod (inches) | 3,000 ft | $3,845.00 |
Prices are live from the store.
Leica Rugby 60DG vs. Leica Rugby 680
Both are dual grade Leica Rugby lasers, and they are genuinely different instruments. The 680 is semi-automatic; the 60DG is fully automatic. Here is every difference that shows up in the field.
| Rugby 680 | Rugby 60DG | |
|---|---|---|
| Self-levelling | Semi-automatic | Fully automatic, both axes |
| Maximum grade | 8 % | 15 % |
| Rotation speed | 600 rpm only | 300 / 600 / 900 rpm |
| Orientation | Upright only | Upright or laydown for vertical |
| Remote control | Not remote capable | RC60 remote, 1,000 ft |
| Beam catch & beam lock | Not available | Both, via the Rod Eye 105B |
| Accuracy | ±1/16" at 100 ft | ±1/16" at 100 ft |
| Protection | IP67 | IP67 |
Shopping the Rugby 680 instead? See the Rugby 680 with Rod Eye 160 receiver and the Rugby 680 K1 package with tripod and tenths rod.
Leica Rugby 60DG — Questions & Answers
Can I type in a grade like 5 %, or do I have to tilt the laser by eye?
Is the grade rod in tenths or inches?
What is the difference between this and the Leica Rugby 680?
What does “beam catching” actually do?
Can I run grade on both axes at the same time?
Rechargeable or alkaline — what happens if I forget to charge it?
How far will it reach?
Can I use it vertically?
What is the head speed for, and why three of them?
Is this the same laser as the GeoMax Zone60 DG?
The laser keeps stopping and re-levelling. Is it faulty?
How do I know when it needs calibrating, and can I check it myself?
What do the alert screens mean?
Who do I call if I am not sure this is the right laser?
Pair it up
A dual grade laser is only as steady as what it stands on. Aluminum, composite and wood/fiberglass heavy duty tripods for daily grade work.
Shop heavy duty tripods →Crank the instrument up without breaking the setup. The right choice when the laser has to clear forms, spoil or traffic.
Shop elevator tripods →Rigid and true for repeat shots on the same grade. Available in tenths and in inches.
Shop aluminum grade rods →Non-conductive and lighter to carry all day. The safer rod anywhere near overhead power.
Shop fiberglass grade rods →Downloads
Leica's own published documents for the Rugby 60DG — the data sheet and the full 62-page user manual — hosted here so the links do not rot.